Save to Pinterest
 The first time I made msemen, I was standing in a small Marrakech kitchen with my friend Fatima, watching her hands move with such speed and certainty that the dough seemed to transform on its own. She'd laugh whenever I'd ask a question, then show me again, slower this time, letting me feel how thin the dough should stretch and how the butter and semolina created those magical layers. I came home determined to recreate that moment, and now every time I pull a golden square from the pan, I'm back there—golden light streaming through the window, the smell of warming honey, and the simple joy of making something with your hands.
I made these for a group of friends during an unplanned Sunday brunch, and watching them tear into that first bite—the flakes scattering everywhere, the honey dripping, their faces lighting up—reminded me why I fell in love with cooking. One friend asked if they were homemade three times in the span of five minutes, which became the running joke of the morning.
Ingredients
- All-purpose flour (2 cups): This is your foundation, and using good quality flour makes a noticeable difference in how the dough feels and stretches.
- Fine semolina (1 cup): This is what gives msemen its characteristic texture and slight nuttiness—don't skip it or use cornmeal as a substitute.
- Sugar and salt (1 tsp each): These seem small, but they balance the dough and help develop gluten structure.
- Warm water (1 1/4 cups): Temperature matters here—too hot kills the yeast, too cold and the dough won't come together smoothly.
- Instant yeast (1 tsp, optional): This creates a lighter, airier crumb if you choose to use it, but traditional versions skip it entirely.
- Vegetable oil and melted butter (1/2 cup oil, 1/4 cup butter): The oil helps you shape, and the butter creates those layers everyone dreams about.
- Extra fine semolina for layering (1/4 cup): This prevents sticking and adds crucial texture to every bite.
- Warmed honey for serving: Use the best honey you can find—it deserves it.
Tired of Takeout? 🥡
Get 10 meals you can make faster than delivery arrives. Seriously.
One email. No spam. Unsubscribe anytime.
Instructions
- Mix and rest the dough:
- Combine your dry ingredients, then gradually work in the warm water until you have a soft, smooth dough—it should feel almost silky. Knead for a full 10 minutes; your arms will know when it's right because the dough will become elastic and responsive. Let it rest covered for 15 minutes while you take a breath.
- Divide into portions:
- Cut the dough into 8 equal pieces and roll each into a ball with oiled hands. This is a good moment to organize your workspace because the next steps move quickly.
- Stretch and layer:
- Oil your hands generously and flatten one dough ball into an almost transparent circle—you should nearly see through it. Brush with melted butter, sprinkle with semolina, then fold the edges toward the center to create a square, buttering and semolina-ing each fold as you go. The layers are building with each fold.
- Rest the shaped squares:
- Let them sit for 5 minutes while you heat your skillet—this resting time helps them relax so they won't tear when you fry them.
- Flatten and fry:
- Gently press each square to about 1/4-inch thickness (they'll puff slightly), then place in your hot oiled skillet. Listen for that gentle sizzle; fry 2-3 minutes per side until they're deep golden brown and the flakes are visible at the edges.
- Finish with honey:
- Transfer to a plate while still warm and drizzle generously with warmed honey—don't be shy about it.
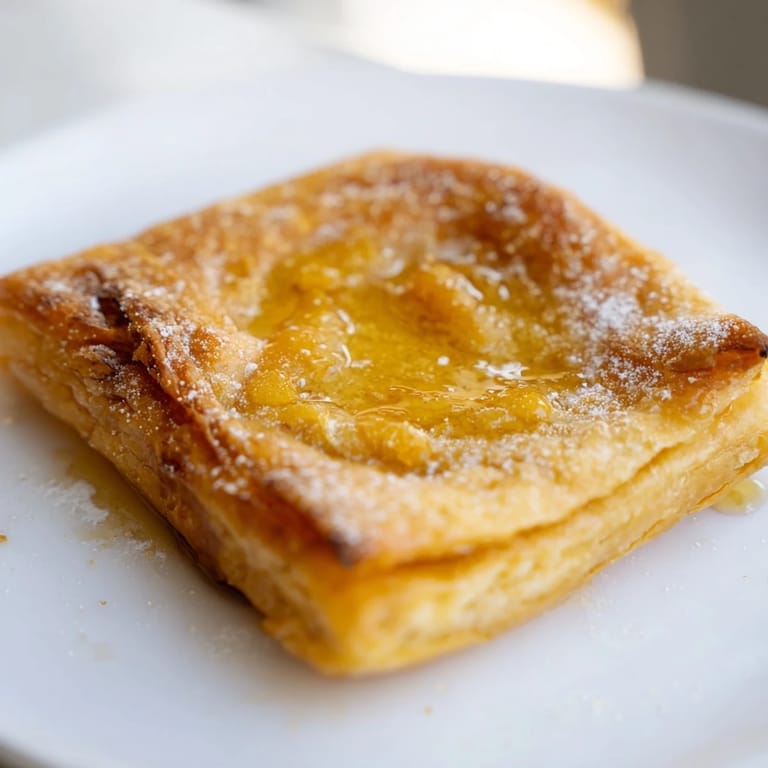 Save to Pinterest
 There's a moment, just after the first flip, when you hear the specific crackle that tells you everything's going right. The pastry suddenly feels lighter under the spatula, the smell shifts from raw dough to toasted butter and semolina, and you know you've got something special coming. That's when I always think, "This is why I do this."
The Art of Stretching
Stretching msemen dough feels intimidating until you realize the dough actually wants to cooperate with you. The oil on your hands is doing the heavy lifting—it prevents sticking and lets the gluten relax. Work slowly, starting from the center and moving outward with gentle pressure, rotating the circle as you go. If you're nervous about tearing it, remember that in Morocco, home cooks don't stress about small tears; they patch them and move forward. The imperfections actually add character to the final pastry.
Frying Like a Pro
The skillet temperature is where most people stumble, and it's the one thing worth paying attention to. You want medium heat—hot enough that the pastry sizzles immediately but not so hot that the outside burns before the inside cooks through. The oil should shimmer and move freely around the pan, not sit in pools. Those first few seconds are important: you'll see the bottom start to puff and brown, which means the layers are separating and steam is creating that flaky structure. When you flip, the second side usually cooks faster because the heat has built up, so keep your eye on it.
Making It Your Own
Once you understand the basic technique, msemen becomes a canvas for experimentation. Some mornings I add a pinch of cinnamon or orange blossom water to the dough for a subtle fragrance. Other times, I serve it alongside amlou (that incredible almond-honey spread) instead of plain honey, which transforms breakfast into something almost dessert-like. The beauty of this recipe is that it's forgiving enough to play with while still delivering that perfect crispness every time.
- Try serving with fresh jam or soft cheese for a different flavor journey.
- Leftover msemen reheats beautifully in a skillet with a light touch of oil—it takes just a minute per side.
- Make the dough ahead and refrigerate it; it actually develops better flavor overnight.
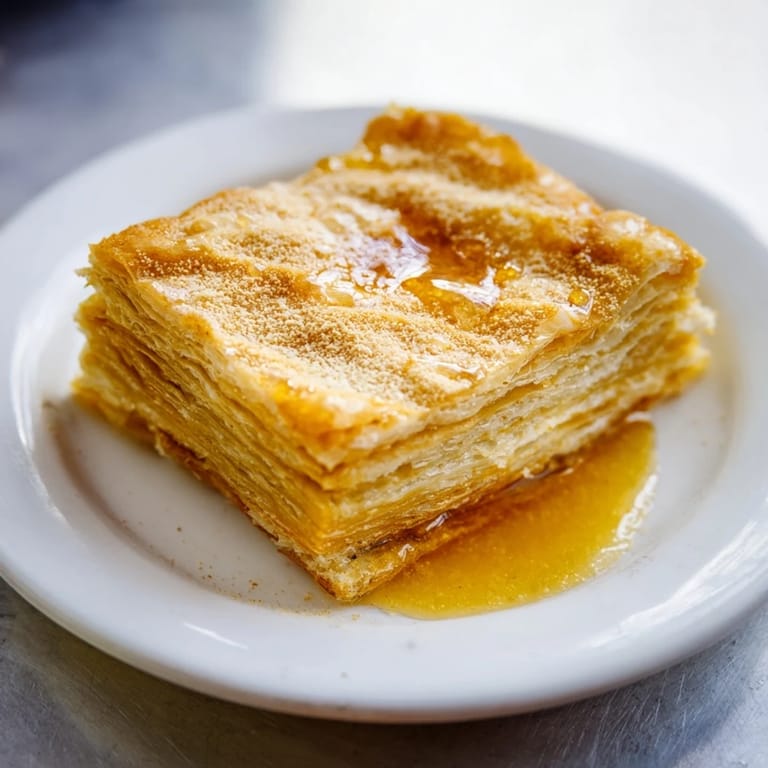 Save to Pinterest
 Making msemen connects you to generations of cooks who figured out how to create something impossibly delicate and nourishing with just flour, water, and patience. Every time someone sits down to eat one warm from the pan, with honey soaking into the layers, they're part of that same story.
Recipe FAQ
- → What ingredients create msemen's layered texture?
The dough combines all-purpose flour and fine semolina, with butter brushed during folding, creating tender, flaky layers when pan-fried.
- → How should msemen be cooked for best results?
Pan-fry the folded squares over medium heat until golden brown on both sides, ensuring a crisp exterior and soft layers inside.
- → Can msemen be flavored differently?
Yes, adding cinnamon or orange blossom water to the dough enhances aroma and adds a fragrant twist to the traditional flavor.
- → What are suitable accompaniments for serving?
Warm honey is classic, but msemen also pairs wonderfully with almond-honey spread or fresh jams to enrich taste.
- → How to store and reheat leftover msemen?
Store leftovers tightly wrapped and reheat in a skillet or toaster to restore crispness and warmth.