 Save to Pinterest
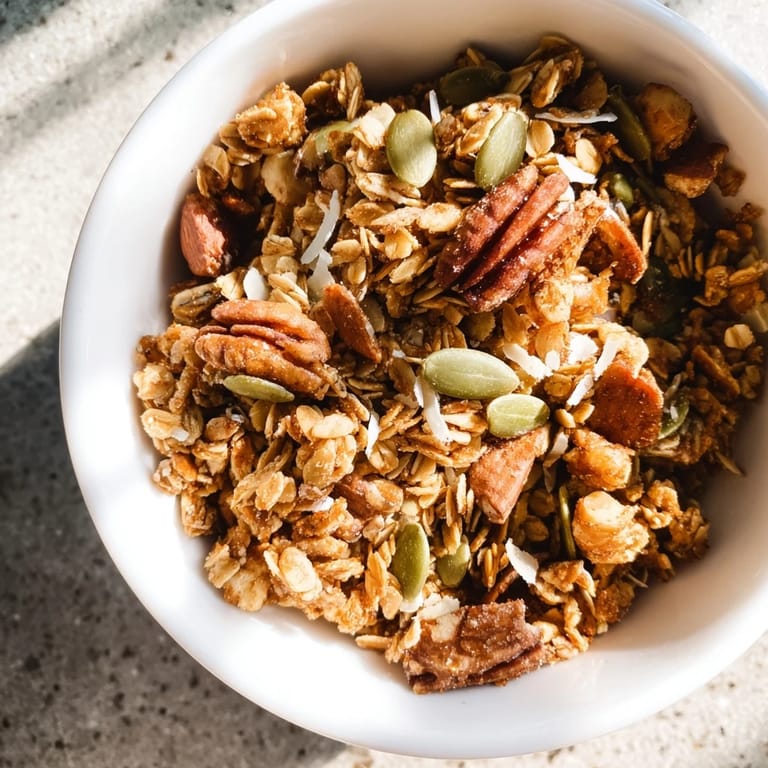
 There's something about the sound of granola toasting in the oven that makes a Saturday morning feel intentional. I discovered this recipe while standing in my kitchen on a lazy weekend, staring at a half-empty jar of honey and wondering if I could turn simple pantry staples into something crunchy enough to make store-bought versions feel unnecessary. The first batch came out golden and fragrant, and before it even cooled completely, I was sneaking clusters straight off the baking sheet like a kid who couldn't be bothered with patience.
My partner walked in one morning while I was pulling a batch from the oven and immediately asked if I was opening a bakery. I laughed, but then I started giving little containers of the cooled granola to friends, and suddenly I was the person known for homemade granola, which felt oddly wonderful for something that took less than an hour from start to finish.
Ingredients
- Rolled oats (2 cups): Old-fashioned varieties hold together better than quick oats because their larger flakes create a more stable structure, and they taste noticeably nuttier when toasted.
- Mixed nuts (1 cup, coarsely chopped): The variety keeps things interesting, and chopping them yourself ensures pieces large enough to stay crunchy throughout storage.
- Shredded unsweetened coconut (½ cup, optional): This adds a subtle tropical note and extra crunch, but skip it if coconut isn't your thing without any guilt.
- Pumpkin or sunflower seeds (¼ cup): These contribute both texture and nutrients, plus they toast beautifully and add visual interest to each bite.
- Ground cinnamon (½ tsp): A pinch goes further than you'd expect, warming the whole batch without overwhelming it.
- Fine sea salt (¼ tsp): This small amount balances sweetness and makes every other flavor pop unexpectedly.
- Honey (⅓ cup): The binding agent that holds everything together; maple syrup works perfectly if you're going vegan.
- Melted coconut oil (¼ cup): This carries flavor and helps create those golden, crispy clusters; neutral oil works fine if you prefer a less coconut-forward taste.
- Vanilla extract (1 tsp): A small amount that makes an enormous difference in depth and warmth.
- Dried fruit and dark chocolate chips (optional, added after baking): Wait until after cooling to add these, or the chocolate will soften and fruit will toughen unpredictably.
Tired of Takeout? 🥡
Get 10 meals you can make faster than delivery arrives. Seriously.
One email. No spam. Unsubscribe anytime.
Instructions
- Preheat and prepare:
- Set your oven to 325°F and line a large baking sheet with parchment paper so nothing sticks and cleanup becomes nearly effortless. This temperature is lower than you might expect, but it allows everything to toast gradually and turn golden without burning.
- Mix the dry base:
- In a large bowl, combine oats, nuts, coconut, seeds, cinnamon, and salt, stirring until the spices are evenly distributed throughout. You'll notice the mixture starts to smell wonderful just from this step alone.
- Blend the wet ingredients:
- In a separate bowl, whisk honey, melted coconut oil, and vanilla together until fully combined. The warmth of the oil helps everything merge smoothly.
- Bring it together:
- Pour the wet mixture over the dry ingredients and stir thoroughly until everything glistens and you see little clumps starting to form naturally. This step takes patience but rewards you with texture.
- Spread and press:
- Transfer the mixture to your prepared baking sheet and spread it into an even layer, then gently press down with a spatula to encourage cluster formation. Don't compress it too hard, or you'll end up with one giant slab instead of separate pieces.
- Toast to golden:
- Bake for 22 to 25 minutes, rotating the pan halfway through so it browns evenly. You'll know it's ready when the edges turn noticeably darker and the kitchen fills with that irresistible toasted aroma.
- Cool completely undisturbed:
- This is the hardest part, but remove the pan from the oven and let everything sit at room temperature without stirring or touching it. This resting period is what transforms the mixture into proper clusters instead of individual pieces.
- Finish and store:
- Once fully cooled, break the granola into clusters by hand or gently run a spatula across the surface. Fold in dried fruit or chocolate chips now if you're using them, and transfer everything to an airtight container where it stays crunchy for up to two weeks.
 Save to Pinterest
 The first time someone told me this homemade granola tasted better than anything they could buy, I realized this recipe had quietly become more than breakfast. It was something I could make on a quiet morning and share without apology, a small gesture that somehow meant more because it came from my hands and my kitchen.
Customizing Your Clusters
The beauty of making granola at home is the freedom to adjust every element to match your preferences exactly. I've played with countless variations over time, swapping almonds for cashews, trying different dried fruits, even adding a sprinkle of cardamom once just to see what would happen. Each version taught me something about balance and texture, and none of them ever disappointed me or anyone I've fed them to.
Storage and Freshness
Homemade granola keeps beautifully in an airtight container for up to two weeks, which is reassuring when you're making a batch for the week ahead. The key is truly airtight storage because exposure to humidity will soften everything quickly, turning crispy clusters soft within days. I keep mine in a glass jar with a tight lid on the counter where it's visible and tempting.
Serving Ideas and Kitchen Discoveries
Beyond the obvious yogurt bowl or milk pour, I've discovered this granola works beautifully sprinkled over ice cream, mixed into homemade trail mix, or eaten straight from the container while reading Sunday newspapers. A handful added to smoothie bowls transforms them into something textured and interesting, and it makes an unexpectedly lovely gift tucked into a pretty jar with a handwritten label.
- Mix it with melted chocolate and press into a pan for an easy granola bar that tastes homemade because it actually is.
- Layer it with Greek yogurt and fresh berries in a glass for an instant dessert that feels fancier than the five minutes it took to assemble.
- Toast a handful in a dry skillet for thirty seconds if it ever loses its crunch, refreshing the texture instantly.
 Save to Pinterest
 Making granola from scratch is one of those small kitchen victories that compounds over time, turning a simple recipe into a habit that makes life taste intentionally good. Every batch reminds me why homemade matters.
Recipe FAQ
- → How do you prevent granola clusters from breaking apart?
The key is letting the granola cool completely on the baking sheet without stirring. This allows the honey and oil to set and bind the clusters together. Gently press the mixture with a spatula before baking to encourage cluster formation.
- → Can you substitute honey with other sweeteners?
Yes, maple syrup works perfectly as a 1:1 replacement and makes the granola vegan. Agave nectar or brown rice syrup are also good options, though they may slightly alter the flavor and browning time.
- → What's the best way to store homemade granola clusters?
Store in an airtight container at room temperature for up to two weeks. Keep dried fruit and chocolate additions separate if adding them, or mix after cooling to maintain optimal texture and prevent softening.
- → How can you make this vegan-friendly?
Replace honey with maple syrup in equal amounts. Use coconut oil or other plant-based oil, and omit any optional dark chocolate chips or choose vegan varieties. The recipe is naturally vegan except for the honey component.
- → What nuts and seeds work best for this?
Almonds, pecans, and walnuts are classic choices, but feel free to use cashews, hazelnuts, or macadamia nuts. Add pumpkin seeds, sunflower seeds, chia seeds, or flax seeds for extra nutrition and crunch. Mix and match based on preference.