 Save to Pinterest
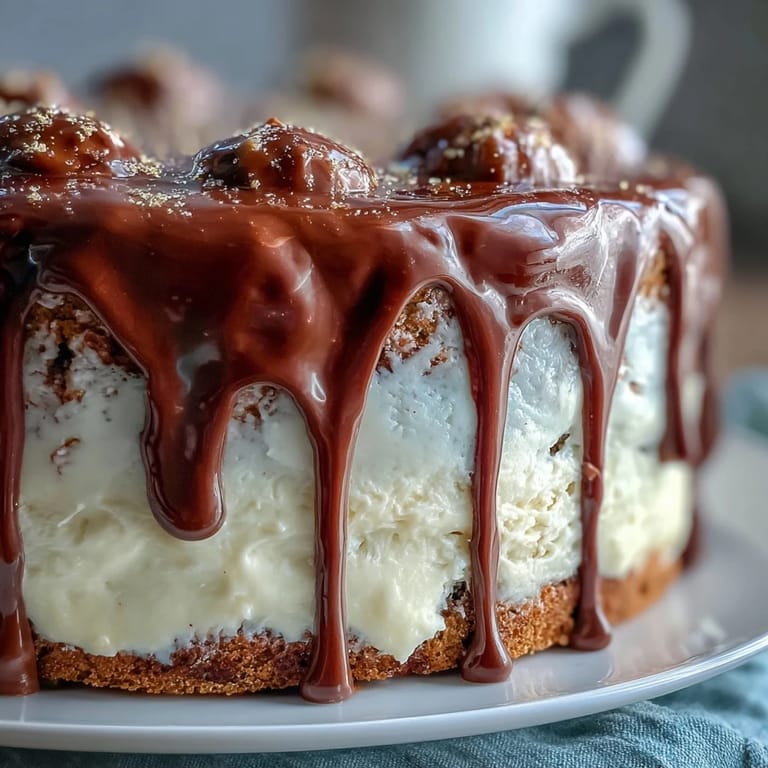
 My friend's graduation morning started with her calling in a panic—she'd promised to bring the cake, and suddenly realized her bakery order fell through. I found myself in my kitchen at dawn, pulling out mixer bowls and thinking about how cakes have this magical way of turning up when you need them most. That's when I created this white chocolate drip cake, one that felt both elegant enough for a milestone and doable enough to pull off before noon. The tender vanilla sponge soaks up the richness of silky buttercream, while that dramatic white chocolate cascade down the sides says celebration louder than any words could.
Watching her face when she saw it sitting on the dessert table at her party—that moment was worth every minute of flour dust and buttercream adjustments. She cried a little, which made me realize that sometimes the cake is really about showing up for someone when it matters.
Ingredients
- All-purpose flour (2 ½ cups): The foundation of a crumb that's tender without being fragile; sift it to avoid dense pockets.
- Baking powder (2 ½ tsp): Works with the creaming method to give height and lightness without needing baking soda.
- Unsalted butter (1 cup plus 1 cup for frosting): Room temperature is non-negotiable—cold butter won't incorporate air, and that air is what makes the cake soft.
- Granulated sugar (2 cups): The creaming process with butter should take exactly three minutes and turn pale yellow; rushing this step costs you volume.
- Eggs (4 large): Room temperature so they blend seamlessly and won't shock the batter into breaking.
- Pure vanilla extract (1 tbsp plus 1 tsp): Use pure, never imitation, especially since vanilla is the whole point here.
- Whole milk (1 cup): The acidity balances the richness and keeps the crumb open and forgiving.
- Powdered sugar (4 cups): Sift before measuring to prevent lumpy frosting that feels grainy on the tongue.
- White chocolate (6 oz melted for frosting, 6 oz chopped for drip): Choose quality chocolate with cocoa butter; cheap white chocolate tastes waxy and won't set properly.
- Heavy cream (2–3 tbsp for frosting plus ¼ cup for drip): The cream adjusts frosting consistency and makes the drip flow like silk when warmed.
- White chocolate crispy pearls or malt balls (1 cup): These catch the gold spray beautifully and add texture contrast against the smoothness.
- Edible gold spray or luster powder: A little goes a long way; use in a well-ventilated space and let dry completely before touching.
Tired of Takeout? 🥡
Get 10 meals you can make faster than delivery arrives. Seriously.
One email. No spam. Unsubscribe anytime.
Instructions
- Set Your Stage:
- Preheat the oven to 350°F and line three 8-inch pans with parchment; room-temperature ingredients are already sitting out, right? This is the moment to gather everything in one place so you're not hunting for vanilla while batter waits.
- Dry Ingredients Come First:
- Whisk flour, baking powder, and salt in a medium bowl until they're evenly distributed. There's something almost meditative about this step—the whisking aerates the flour and prevents lumps later.
- Cream Butter and Sugar:
- Beat room-temperature butter and sugar together for exactly three minutes until pale and fluffy; you'll feel the resistance change as air incorporates. This is where the cake's lift comes from, so don't skip time here.
- Introduce the Eggs:
- Add eggs one at a time, letting each one fully mix before the next goes in; this prevents the batter from looking curdled and ensures even distribution. Each egg should disappear into the creamed mixture within about 30 seconds.
- Add Vanilla and Alternate Wet and Dry:
- Stir in vanilla, then switch to low mixer speed and add flour and milk in three additions, starting and ending with flour. The reason for low speed is simple: too much mixing develops gluten, which tightens the crumb.
- Bake Until Golden and Set:
- Divide batter evenly among pans and bake for 30–35 minutes until a toothpick comes out clean and the top springs back gently. The cakes should be pale gold, not brown—overbrowned edges mean the inside will be dry.
- Cool with Patience:
- Let cakes rest in pans for exactly 10 minutes so the structure sets, then turn them onto wire racks for complete cooling. Frosting a warm cake is a recipe for sliding layers, so pour yourself a coffee and be patient here.
- Make the White Chocolate Buttercream:
- Beat softened butter until smooth, then gradually add sifted powdered sugar while mixing; this prevents lumps that feel gritty. Fold in cooled melted white chocolate, vanilla, salt, and heavy cream until light and fluffy, adding more cream if it's too stiff.
- Build the Cake:
- Level the cooled cakes if needed, place the first layer on your serving plate, and spread with buttercream; repeat with the second layer. Apply a thin crumb coat to trap any loose crumbs, chill for 30 minutes, then apply the final generous coat, smoothing with an offset spatula.
- Create the White Chocolate Drip:
- Heat heavy cream until just simmering, pour it over chopped white chocolate, and let sit for one minute before stirring until perfectly smooth and glossy. The ganache should cool to room temperature—too warm and it slides off; too cool and it won't flow.
- Drip and Fill:
- Using a spoon or squeeze bottle, let the white chocolate cascade down the cake's edges naturally, filling the center with more ganache and smoothing the top with a spatula. The imperfection is the beauty here; each drip tells a story.
- Prepare Gold Balloons:
- Spray or dust the white chocolate pearls or malt balls with edible gold in a well-ventilated area, then let them dry completely on parchment paper. Once dry, insert toothpicks or thin cake wires into each one so they stand upright like tiny balloons.
- Arrange and Chill:
- Cluster the gold balloons on top of the cake in a festive arrangement, then refrigerate until serving time. Bring the cake to room temperature for 30 minutes before slicing so the flavors come through and the texture is perfect.
 Save to Pinterest
 That graduation party ended with someone asking for the recipe, then another person, then her mom calling me to ask if I'd make one for her book club. That's when I understood that celebration cakes do more than mark time—they become the memory itself.
The Secret of Silky White Chocolate Buttercream
White chocolate buttercream can turn grainy or separate if you're not intentional about temperature. The melted white chocolate must be cooled to room temperature before folding into the butter mixture, otherwise the heat causes the cocoa butter to seize up and create tiny broken bits. I learned this the hard way after making three batches in one afternoon, frustrated and sticky. Now I let the melted chocolate sit on the counter for exactly 10 minutes, then test it by dipping a clean finger in—it should feel cool but still pourable. The heavy cream at the end rescues overstiff frosting, but it's easier to avoid the problem by adding it slowly while mixing on low speed.
Why Three Layers Matter
A two-layer cake looks shorter and feels less special, but three thin layers create the visual impact that makes people gasp. Each layer also means more buttercream to taste, and the frosting is honestly what people remember. Three layers also bake more evenly than two thick ones—they're done in 30–35 minutes instead of potentially 40–45, which means less chance of a dry top with an underdone center. The height also gives you more surface area for that dramatic white chocolate drip.
Perfecting Your Drip and Styling
The drip is the showstopper, and it's actually more forgiving than it looks. The ganache can be manipulated—if it's too thin, let it cool longer; if it's too thick, warm it gently over barely simmering water. I've learned that less is more; three or four drips down each side looks intentional, while too many look like something went wrong. The gold balloons are your celebration exclamation point, and you can adjust their density depending on how festive you want the finished cake to look.
- Practice the drip on a test plate first if you're nervous—it teaches your hand the right speed.
- Let the ganache cool completely before opening refrigeration or it might crack.
- Gold balloons can be made days ahead and stored in an airtight container, so prep them early if time is tight.
 Save to Pinterest
 This cake tastes like celebration tastes—buttery, sweet, elegant, and absolutely worth the effort. Every time you make it, you're creating a moment someone will remember forever.
Recipe FAQ
- → How do I achieve a smooth white chocolate drip?
Heat heavy cream until just simmering then pour over chopped white chocolate. Let sit briefly before stirring until smooth and glossy for an even drip effect.
- → What’s the best way to keep the vanilla sponge moist?
Ensure proper measurement of ingredients and avoid overmixing. Baking the sponge until a toothpick comes out clean but still moist will help retain tenderness.
- → Can I prepare the cake decorations in advance?
Yes, the gold balloon elements can be prepared a day ahead and stored in a dry place before assembling on the final cake.
- → How do I store the completed cake to maintain freshness?
Store the cake covered in the refrigerator for up to three days. Bring to room temperature before serving for optimal texture and flavor.
- → Are there alternatives for the gold balloon decorations?
You can substitute with gold-wrapped chocolate candies or edible gold dusted treats to achieve similar festive appeal.