 Save to Pinterest
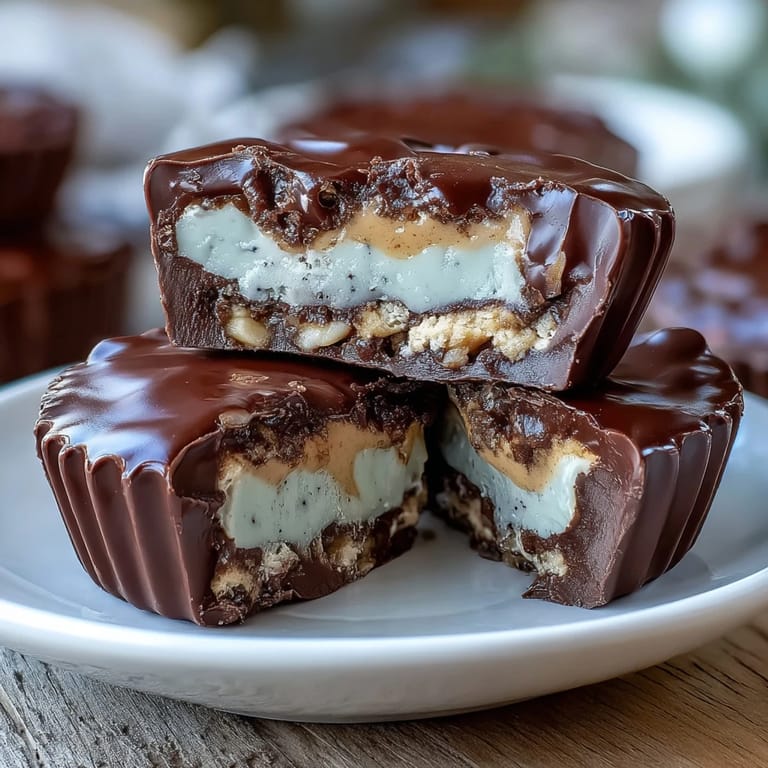
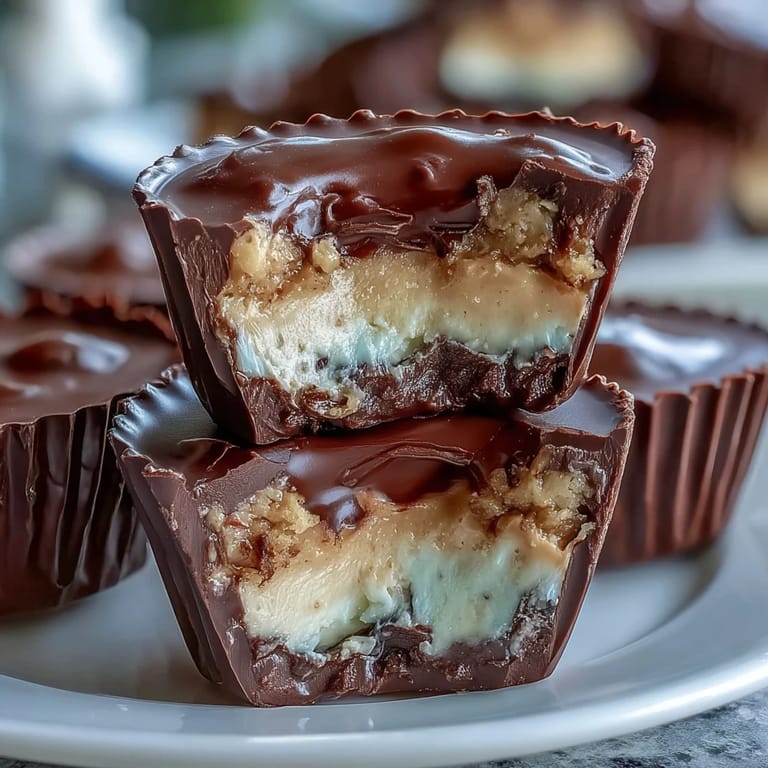
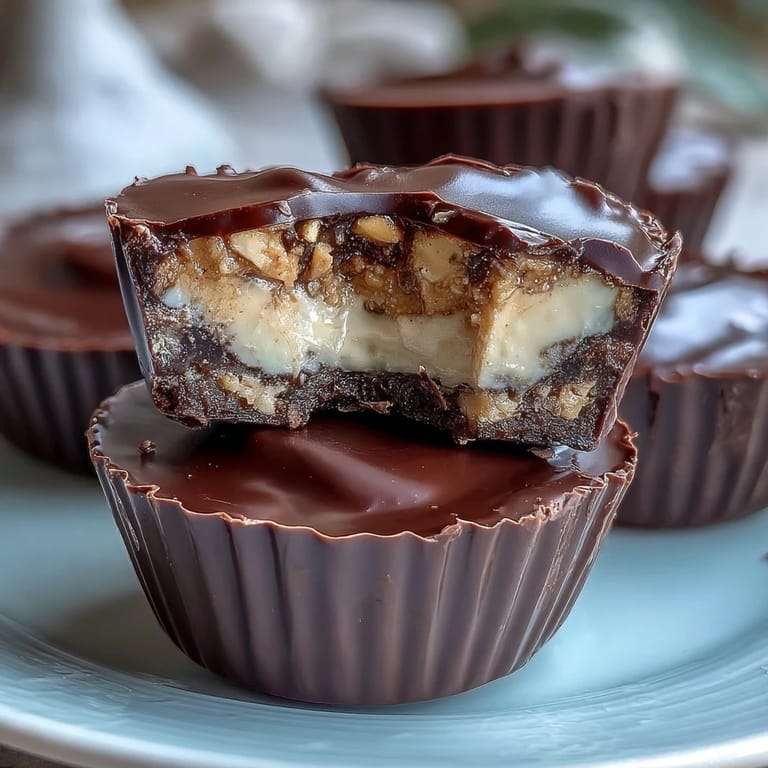
 My gym buddy Sarah showed up to our coffee date with these little chocolate cups stacked in a container, and when I bit into one, the creamy Greek yogurt center completely caught me off guard—in the best way. She'd been experimenting with protein snacks that didn't taste like cardboard, and this recipe became her secret weapon. The combination of dark chocolate, tangy yogurt, and nutty peanut butter felt like eating dessert while actually fueling your body, which honestly seemed too good to be true. I asked for the recipe on the spot, and now they're my go-to when I need something satisfying that won't derail my day.
I made these for my book club last month and watched everyone's faces light up when they realized what they were eating—no one expected something this decadent to actually be good for them. One friend who's usually skeptical about health food asked for the recipe before she even finished hers, and now she's making them weekly for her kids' lunchboxes. That moment when a recipe becomes something people actually want to remake in their own kitchen is the whole reason I love cooking.
Ingredients
- Dark chocolate (200 g, 70% cocoa or higher): The base matters here—anything lower than 70% cocoa tastes too sweet and masks the yogurt's tang, which defeats the purpose of these cups.
- Coconut oil (1 tbsp): This keeps the chocolate thin enough to coat without adding heaviness; if you skip it, your chocolate shell gets too thick and overshadows everything else.
- Natural peanut butter (120 g): The real stuff with just peanuts and salt—the spreadable kind works if you're in a pinch, but the separation of oil is actually your friend here because it keeps this layer more interesting in texture.
- Vanilla or unflavored whey protein powder (1 scoop, 30 g): This is where you can get creative; vanilla plays nicely with chocolate, but I've had success with chocolate protein too if you want to lean into the cocoa flavors.
- Thick Greek yogurt (180 g, full-fat or 2%): This is non-negotiable—regular yogurt is too thin and your cups will never set properly, plus you'll lose that luxurious creaminess that makes these special.
- Honey or maple syrup (1 tbsp for peanut butter layer, 1 tbsp for filling): Either works, though maple syrup adds an almost woodsy undertone that's lovely if you're a fan of that subtlety.
- Vanilla extract (1 tsp): Just a touch so it doesn't overwhelm—this is about balance, not making them taste like a vanilla candle.
- Salt (pinch): The pinch in the yogurt mixture cuts through the richness and brings everything into focus, like turning up the brightness on a fuzzy photo.
Tired of Takeout? 🥡
Get 10 meals you can make faster than delivery arrives. Seriously.
One email. No spam. Unsubscribe anytime.
Instructions
- Set Up Your Station:
- Line your mini muffin tin with paper liners—this saves you from the frustration of peeling chocolate off silicone or metal later. Take a second to make sure they're sitting flat and centered in each cup.
- Melt the Chocolate Base:
- Microwave your chopped chocolate and coconut oil in 30-second bursts, stirring between each one, until completely smooth and glossy. This gentle approach keeps the chocolate from seizing or developing that dull, chalky finish that happens when you overheat it.
- Layer the First Chocolate:
- Drop about a teaspoon of melted chocolate into each liner and use the back of your spoon to gently push it up the sides slightly, creating a thin shell. Freeze for 10 minutes while you prep the other layers—this gives you a solid base so the next layers don't sink.
- Mix the Peanut Butter Layer:
- In a small bowl, combine the peanut butter, protein powder, and honey, stirring until you get a smooth, spreadable consistency with no streaks of powder. If it feels too thick, you can warm it ever so slightly, but keep the spatula moving so you don't accidentally make it grainy.
- Make the Yogurt Filling:
- Whisk together the Greek yogurt, honey, vanilla extract, and salt until completely creamy and smooth—no lumps, because they'll feel weird when you bite into the finished cup. This should taste like tangy sweetness with a whisper of vanilla, not overpowering at all.
- Build the Middle Layers:
- Pull the chocolate-lined tin from the freezer and gently press about a teaspoon of peanut butter mixture into each cup, then top with a teaspoon of yogurt filling. Use a tiny spoon or the back of your regular spoon to flatten each layer just slightly so they stay in place.
- Seal the Top:
- Spoon the remaining melted chocolate over each cup, making sure the chocolate completely covers the yogurt layer and creates a seal around the edges. This is your insurance policy against the filling drying out or absorbing chocolate flavors you don't want.
- Final Chill:
- Place the whole tin in the freezer for at least an hour—you'll know they're ready when the tops feel completely firm and don't give when you tap them gently. If you forget and leave them overnight, that's honestly even better because the flavors marry together more.
 Save to Pinterest
 There's something almost meditative about assembling these layer by layer—the repetition becomes calming, and by the time you've finished the twelfth cup, you feel like you've actually accomplished something. My partner walked into the kitchen while I was doing this and just watched for a few minutes without saying anything, then asked to help with the last few, and suddenly we were assembly-line cooking together, which turned a snack prep into an actual moment of connection.
Storage and Keeping These Fresh
These live happily in the refrigerator for about five days, though honestly they taste best when they're still fairly cold and the chocolate has that snap to it. I keep mine in an airtight container on the top shelf so I grab them when I need something sweet without the mental negotiation that usually comes with dessert. If you want to store them longer, freeze for up to three weeks, and they thaw just right in about five minutes on the counter.
Playing with Flavors and Swaps
Once you nail the basic formula, these become a playground for experimentation—I've done cinnamon-flavored yogurt filling, almond butter instead of peanut, and even a version where I added a tiny pinch of cayenne to the chocolate because I was feeling adventurous. The structure stays exactly the same, so you're really just tweaking the flavor notes to match your mood or what's in your pantry. Some of my best kitchen discoveries have come from this recipe precisely because it's forgiving enough to let you play.
Why This Became My Favorite Protein Hack
I used to spend way too much money on pre-made protein snacks that either tasted fake or fell apart in my bag, and these genuinely changed how I approach afternoon hunger. The fact that they're actually satisfying and taste like a treat rather than an obligation makes all the difference in whether I'll actually eat them. These take minimal effort, store beautifully, and feel special enough that you don't mind sharing them or eating one yourself.
- If your chocolate is too thick when you're coating the tops, you can gently reheat it in 10-second bursts rather than starting over.
- The paper liners peel away much easier if you wait until they're completely room temperature rather than trying to peel them while cold.
- Keep extra protein powder on hand because once people taste these, you'll definitely be making batches again soon.
 Save to Pinterest
 These little cups have become my answer to that moment when you want something sweet but also want to feel good about what you're eating—and that's honestly the best outcome any recipe can have. Make them once and they'll absolutely become a rotation in your kitchen.
Recipe FAQ
- → What makes the filling protein-rich?
The filling includes Greek yogurt and whey protein powder, boosting protein content while keeping a creamy texture.
- → Can I use alternatives to peanut butter?
Yes, almond or sunflower seed butter can be substituted for peanut allergies without affecting flavor.
- → How long should the cups chill before serving?
Chilling in the freezer for at least 1 hour ensures the layers set firmly and flavors meld nicely.
- → Is the chocolate layer easy to melt without a double boiler?
Yes, melting chocolate with coconut oil in short microwave intervals while stirring prevents burning and creates a smooth coating.
- → Can I use sugar-free sweeteners in the filling?
Honey or maple syrup can be replaced with stevia or sugar-free syrup to reduce sugar content without losing sweetness.
- → How should leftovers be stored?
Keep the cups refrigerated and consume within a few days for best taste and texture.