 Save to Pinterest
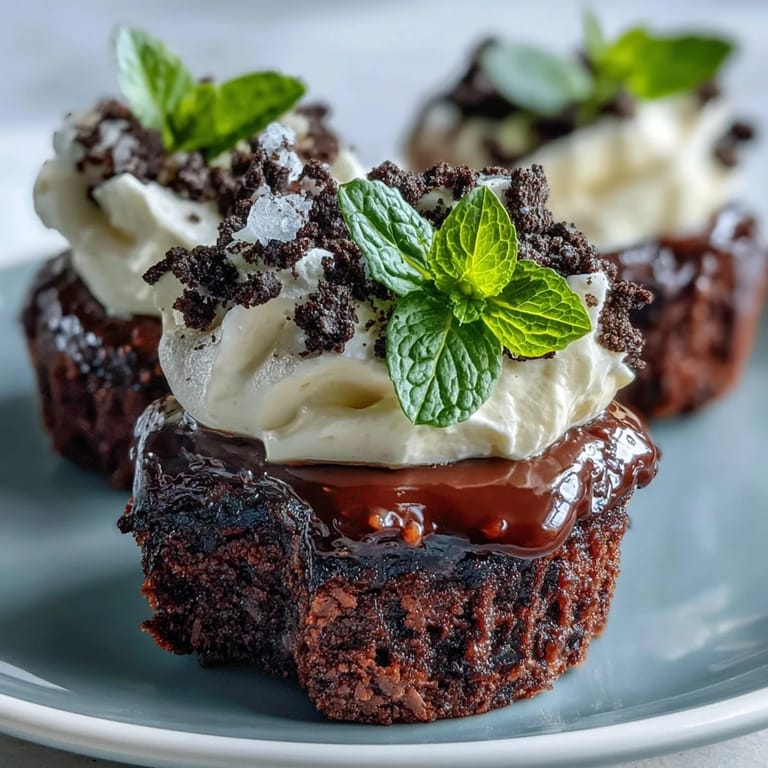
 When spring rolls in and the air smells faintly of cut grass and blooming lilacs, something compels me to make desserts that are as playful as the season itself. A few years ago, after a long day spent potting herbs on my balcony, I found myself eyeing the empty terracotta pots and wondering what sweet surprise I could tuck into them. That's how these Mother's Day Flower Pot Brownies were born—a happy collision of whimsy and rich chocolate. The kitchen counter was a mess of cocoa dust and Oreo crumbs, but I remember laughing at how convincing the 'soil' looked, and how delighted my mom was when she realized the flowers were edible too. It’s become my own little springtime tradition ever since, and there's always room for cheerful mischief in a dessert.
Last Mother's Day, I made these for brunch with my family, and my niece actually tried to 'plant' a gummy worm in her pot before licking the whipped cream off her spoon. Hearing everyone argue (good-naturedly) over who had the prettiest edible flower was half the fun. There's something about sharing these little garden pots that makes everyone feel playful again. Even my dad, who claims to dislike sweets, didn't leave so much as a crumb behind. That memory always makes me smile when I prep the kitchen for round two.
Ingredients
- Unsalted butter: Using good quality butter is worth it for that deep, fudgy flavor—make sure it’s fully melted but not sizzling, so it blends smoothly.
- Granulated sugar: I like to whisk this in while the butter’s still warm; it dissolves easier and makes for the shiniest, crackliest brownie tops.
- Large eggs: Bring them to room temperature so they mix in seamlessly—cold eggs can make your batter seize.
- All-purpose flour: Just enough to bind but not so much that your brownies become cake—measure kindly.
- Unsweetened cocoa powder: Dutch-process gives a deeper hue, but any good cocoa will do; sift it to avoid lumps.
- Baking powder: Only a touch for lift—too much and you’ll lose that dense brownie bite.
- Salt: Don’t skip it; just a pinch deepens all the cocoa notes.
- Vanilla extract: It’s subtle, but the difference is real—add with the sugar for an even aroma.
- Oreo cookies: Leave the cream in—it's what makes the “dirt” clump perfectly like garden soil.
- Heavy cream: Chill the bowl and beaters first for fluffiest peaks.
- Powdered sugar: Two spoonfuls will do—taste as you whip for perfect sweetness.
- Edible flowers or gummies: Always double check they’re food-safe, and rinse gently before decorating.
- Fresh mint leaves (optional): A leafy pop of color and fragrance if you have some in your garden window.
Tired of Takeout? 🥡
Get 10 meals you can make faster than delivery arrives. Seriously.
One email. No spam. Unsubscribe anytime.
Instructions
- Prep the pots:
- If using oven-safe mini flower pots, line the bottoms with parchment so the brownies lift out easily; non-oven pots mean you’ll bake and cut brownies to fit later.
- Make the brownie batter:
- Melt your butter gently and whisk in the sugar and vanilla until glossy, breathing in the warm, sweet scent.
- Mix in eggs:
- Beat in each egg till the mixture is silky and thick, pausing occasionally to scrape down the bowl.
- Combine dry ingredients:
- Sift the flour, cocoa, baking powder, and salt together, then fold them in with a spatula just until streaks disappear—don’t overmix.
- Fill and bake:
- Spoon batter into greased pots or pan, smoothing the tops; bake until a toothpick comes out with a few sticky crumbs and the kitchen smells like a chocolate shop, about 20–25 minutes.
- Cool completely:
- Let the brownies rest so they firm up and are easier to handle for assembly—patience pays off here.
- Prepare the “dirt”:
- Pulse Oreos (filling included) into dark crumbs in a food processor, listening for that satisfying crunch, or crush in a bag with a rolling pin if you need to release some stress.
- Whip the cream:
- Beat chilled cream and powdered sugar to stiff peaks; the texture should be pillowy and hold a little swirl when you lift the whisk.
- Assemble the pots:
- Place a square of brownie at the bottom if you baked in a tray, then layer whipped cream on top before dusting generously with Oreo ‘soil.’
- Decorate:
- Press edible flowers, gummies, and mint leaves gently into the “dirt” for a pop of color and garden flair.
- Chill and serve:
- Pop the finished pots into the fridge until it’s time to delight your guests.
 Save to Pinterest
 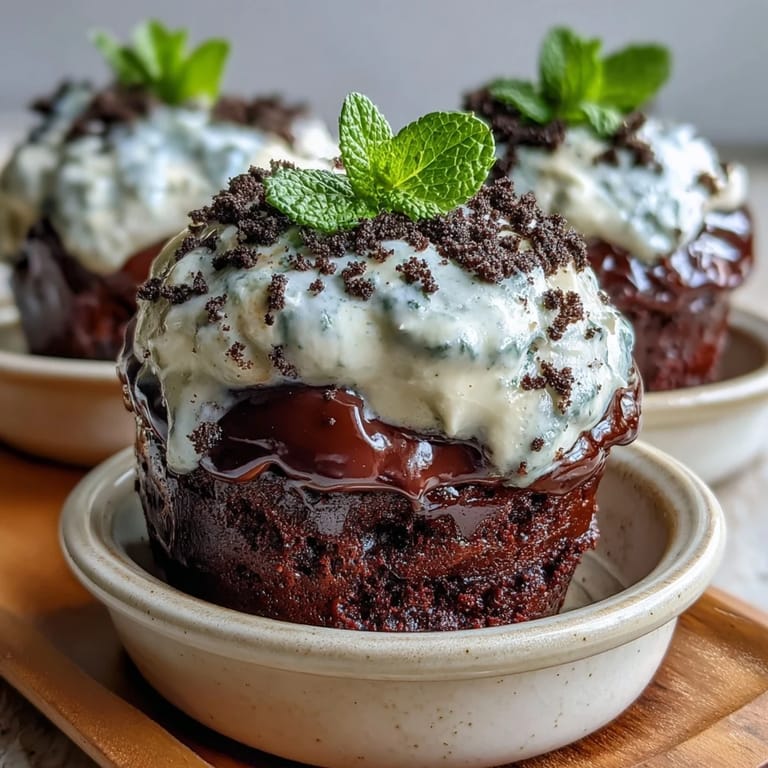 Save to Pinterest
 We ended up eating these in the garden while my mom told stories about her own childhood flower beds. Suddenly, dessert became a reason for everyone to linger outside a while longer, breathing in lilacs and swapping memories. It's funny how a simple treat can nudge a celebration into something more lasting and tender.
Choosing Your Flower Pots or Serving Cups
If you can’t find oven-safe mini pots, ramekins or even sturdy espresso cups work just as well—just remember to check that anything going in the oven is truly heat-safe. Some years I use vintage teacups for a cozy, cottage feel, and the thrill of biting into ‘dirt’ feels just as cheeky.
Making It Ahead and Keeping It Fresh
You can bake the brownies a day in advance, keeping them wrapped tight to stay moist. Wait to add the cream, dirt, and flowers until a few hours before serving, so everything stays perky and lovely for your table.
Troubleshooting Your Garden Brownies
Sometimes the whipped cream wants to slide off the Oreo layer—just give everything a gentle press and chill a bit longer so it stays put. If your dirt seems too powdery, add a few more Oreos with filling, which helps it clump. Don’t sweat the decorations looking perfect—the real charm is in the homemade look and seeing your guests' eyes light up.
- Stick in the fridge if your kitchen’s warm for best results.
- If the flower pot is too shallow, break the brownie into pieces to fit—no one will know.
- Serve with a little spoon so everyone can dig for treasure.
 Save to Pinterest
 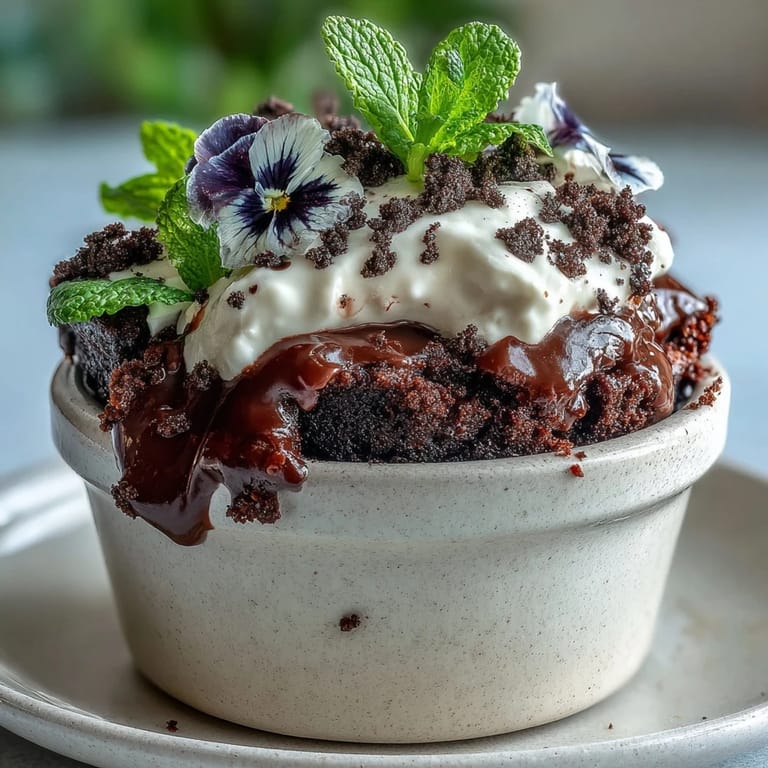 Save to Pinterest
 These flower pot brownies manage to charm both the eye and the palate every time. I can’t wait to see whose hands reach for seconds when you bring them to your next gathering.
Recipe FAQ
- → Can I bake the brownies in a tray instead of pots?
Yes. Bake in a lined baking tray, let cool completely, then cut to fit the pots. Alternatively, use parchment rounds to ease removal if baking directly in small containers.
- → How do I get very fine Oreo crumbs?
Pulse Oreos in a food processor until powdery. If you don't have one, place cookies in a sealed bag and crush with a rolling pin, pressing firmly and sifting larger pieces out.
- → How long should I chill assembled pots before serving?
Chill at least 30 minutes to firm the whipped cream and help the Oreo crumbs settle. For best texture and easier transport, refrigerate up to 2 hours.
- → Are edible flowers safe to use?
Only use flowers labeled food-safe, from reputable suppliers or growers who avoid pesticides. Popular choices include pansies and violets; always wash gently and pat dry before decorating.
- → Can I make components ahead of time?
Yes. Brownies and Oreo crumbs can be prepared a day ahead and stored separately. Whip cream just before assembly for maximum volume and stability.
- → Any tips for preventing soggy bottoms?
Allow brownies to cool completely before adding whipped cream. If baking in ceramic pots, line the base with parchment for ventilation and easier removal.