Save to Pinterest
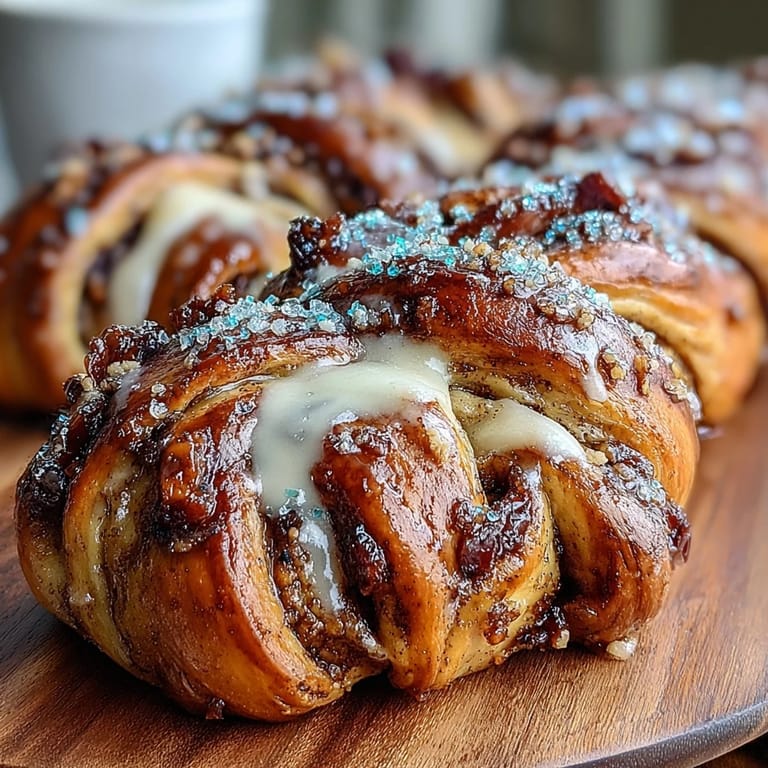
 The first time I braided a King Cake, my kitchen smelled like a bakery and a carnival had collided—yeasty dough rising while I zested lemons with the kind of focus usually reserved for important decisions. My hands were sticky, my counter was floury, and I was absolutely convinced I'd mess up the diagonal cuts until my neighbor knocked on the door and declared it looked like something from a French patisserie. That moment taught me that sometimes the most impressive-looking baked goods are just organized chaos with good intentions.
I made this for a small Mardi Gras gathering last year when nobody really felt like celebrating, and somehow watching my guests' faces light up when they saw those purple, green, and gold stripes made the whole three-hour process feel worthwhile. There's something about a braided cake that makes people pause mid-conversation and actually look at their food, and that pause is worth every minute of rising time.
Ingredients
- All-purpose flour (4 cups): This is your foundation—use fresh flour if you can, as older flour absorbs water differently and might leave your dough slightly dry.
- Active dry yeast (2¼ tsp): Proof it in warm water first; you'll see it foam up like tiny edible clouds, which means it's alive and ready to work.
- Whole milk and warm water: Together they create the perfect temperature for yeast activation—too hot kills it, too cold and it sleeps.
- Eggs and melted butter: The eggs give richness and help bind everything, while butter makes the crumb tender instead of dense.
- Cream cheese (8 oz): Let it soften to room temperature so it blends silky-smooth with the lemon and sugar without lumps.
- Fresh lemon juice and zest: The juice provides tang while the zest gives those bright flavor bursts—don't skip either one.
- Egg yolk in filling: This creates an almost custard-like richness that regular cream cheese alone can't achieve.
- Powdered sugar glaze: Thin enough to drizzle, thick enough to coat without sliding off the sides.
- Colored sanding sugars: These are larger than regular sugar and stay crisp longer, catching light and making your cake look celebratory.
Tired of Takeout? 🥡
Get 10 meals you can make faster than delivery arrives. Seriously.
One email. No spam. Unsubscribe anytime.
Instructions
- Activate your yeast:
- Combine warm water, milk, and yeast in a large bowl and let it sit for about 5 minutes until it's foamy on top—this is your proof that everything's ready to rise. If it doesn't foam, your yeast might be expired, so start over rather than waste time on a dough that won't cooperate.
- Build the dough base:
- Add sugar, eggs, melted butter, and salt to your foamy mixture, stirring until everything is combined and glossy. The melted butter should cool slightly before you add eggs so you don't end up with scrambled eggs in your dough.
- Develop the dough:
- Gradually add flour while mixing, then knead on a floured surface for 8-10 minutes until the dough feels smooth and springs back when you poke it. Your hands will get messy; this is non-negotiable and completely normal.
- Let it rise:
- Place dough in a greased bowl, cover it with a damp towel, and find a warm spot in your home—a sunny windowsill, the top of your refrigerator, or even an oven with just the light on works beautifully. After about 1½ hours, it should have doubled in size and feel pillowy.
- Prepare the filling while waiting:
- Beat softened cream cheese until smooth, then add sugar, lemon juice, zest, and egg yolk, blending until it's creamy and pale. Taste it—adjust lemon if you want more brightness.
- Shape your masterpiece:
- Punch down the risen dough, turn it onto a floured surface, and roll it into a 10x18-inch rectangle, working gently so you don't deflate all that air. Spread the lemon filling down the center third lengthwise, leaving space on both sides for your braid.
- Create the braid:
- Using a sharp knife, cut diagonal strips about 1 inch wide down both sides of the filling, being careful not to cut all the way through—you want to keep the center intact. Starting at the top, fold strips over the filling alternately, left-right-left-right, like you're tucking the filling into a blanket.
- Final rise:
- Transfer to parchment paper, cover loosely with plastic wrap or a towel, and let it rise again for about 45 minutes until it's noticeably puffy. You don't need it to double this time—just enough that it feels alive and airy.
- Bake with golden intention:
- Brush the entire braided surface with egg wash (one egg whisked with milk), then slide it into a 350°F oven for 28-32 minutes until it's deep golden brown and a toothpick inserted in the thickest part comes out clean. The kitchen will smell so good you'll understand why people wake up early just to bake.
- Glaze and celebrate:
- Once completely cooled, whisk powdered sugar with lemon juice or milk until it's thick but drizzle-able, then drape it over the braid. Immediately sprinkle those festive colored sugars in alternating stripes before the glaze sets.
 Save to Pinterest
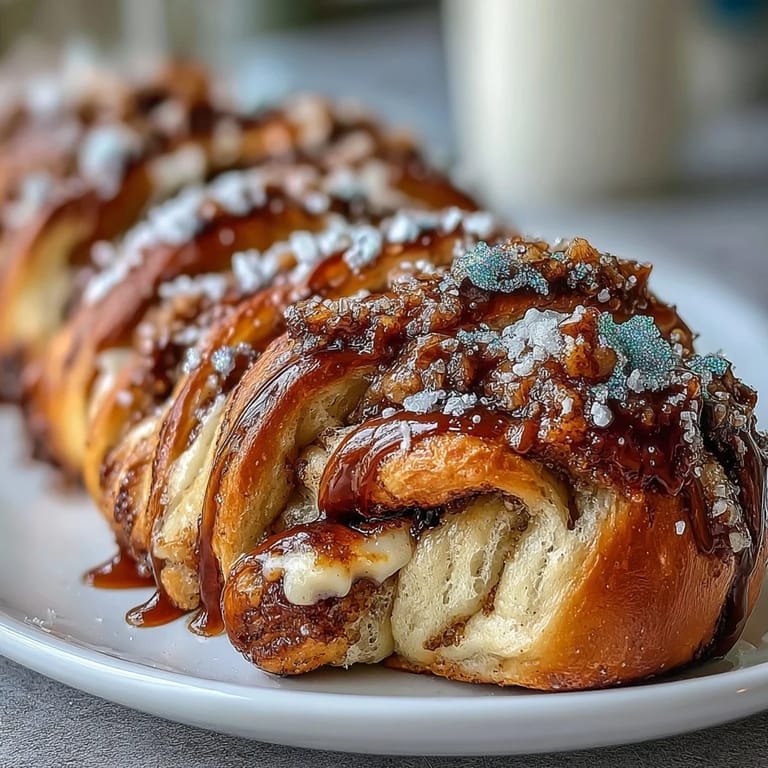
 I served this at a brunch where someone had just gotten a promotion, and watching them take the first bite while sunlight caught those sugar stripes made me realize that sometimes celebration doesn't need a big reason—just good bread and people who show up. That's when food becomes memory.
Why This Braid Works
The diagonal cutting technique isn't just decorative—it creates multiple pockets and edges that get crispy and golden during baking, while the folding keeps the soft, tangy filling protected in the center. I learned this by accident when I got impatient and cut too quickly, creating strips that were slightly uneven but somehow baked more beautifully than my perfectly measured attempts. Sometimes kitchen mistakes teach you more than precision ever could.
The Lemon Balance
Fresh lemon juice and zest are doing different jobs here—the juice adds moisture and tang, while the zest delivers those bright, fragrant hits that make your mouth feel awake. If you're using bottled lemon juice, use less because it's more acidic, and always taste your filling before committing it to the dough. I once made a batch where I doubled the zest thinking more lemon meant more magic, and it was actually a bit too intense, so respect the proportions as written.
Timing and Temperature Wisdom
Yeast is temperature-sensitive, and getting it right means your dough rises properly instead of sitting there like it's thinking about rising.
- Warm milk and water should feel like a comfortable bath temperature on your inner wrist—around 110°F is ideal.
- If your kitchen is cold, set your dough in the oven with just the light on, creating a gentle warmth that coaxes the yeast awake.
- The egg wash should go on just before baking, giving you that beautiful mahogany-gold color that says handmade and special.
 Save to Pinterest
 This bread is best eaten within a day or two while the crumb is still soft and the filling hasn't started to firm up in the cold, but honestly, if you're going to eat it, that timing will probably happen naturally. Make this when you want to slow down for a few hours, when you want something that looks impressive but tastes like home.
Recipe FAQ
- → What flour type is best for this braided cake?
All-purpose flour is recommended for a balanced texture, providing enough structure while keeping the crumb tender.
- → How do I achieve the perfect lemon cream cheese filling consistency?
Beat cream cheese until smooth before blending in sugar, lemon juice, zest, and egg yolk, ensuring a creamy, spreadable filling without lumps.
- → What is the purpose of the egg wash before baking?
Egg wash gives the braid a glossy, golden finish after baking, enhancing both appearance and texture.
- → Can I prepare the dough ahead of time?
Yes, after the first rise, the dough can be refrigerated overnight before shaping and braiding, which also develops flavor.
- → How do the colored sanding sugars affect the final taste?
They add a subtle crunch and a hint of sweetness while providing festive, vibrant color to the finished loaf.