 Save to Pinterest
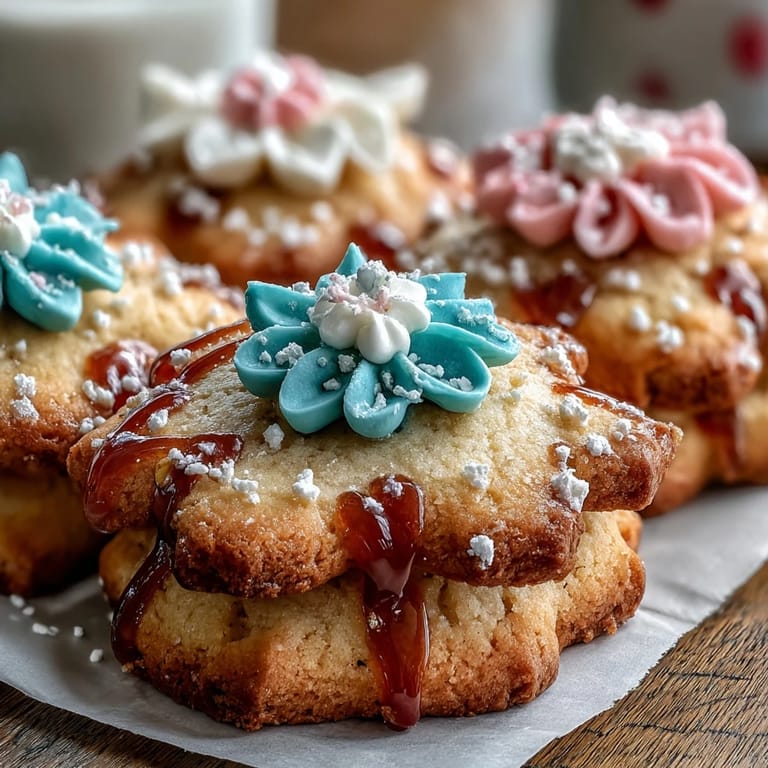
 My sister texted me a photo of her nursery at midnight—soft pastels everywhere, tiny flowers painted on the walls—and suddenly I understood why she kept asking me to make something special for her baby shower. These sugar cookies with royal icing flowers arrived at that party looking almost too delicate to eat, each one a small edible bloom in shades of pink, lavender, and butter yellow. Watching guests hesitate before biting into them, torn between preserving the beauty and giving in to hunger, made the three hours of piping feel entirely worthwhile. There's something quietly magical about turning simple flour and butter into something that makes people smile before they even taste it.
I made four dozen of these for my friend's baby reveal party, staying up the night before to pipe flowers while half-watching a comfort show. My kitchen smelled like vanilla and butter, my hands ached pleasantly, and somewhere around cookie thirty-five, I stopped worrying about perfection and started enjoying the rhythm of it. When my friend's mom saw them arranged on a tiered stand, she actually gasped—not because they were flawless, but because they felt like love made edible.
Ingredients
- All-purpose flour: The foundation of every good sugar cookie; whisk it with the baking powder and salt to avoid lumps in your dough.
- Baking powder: Just a touch keeps these cookies tender and slightly cakey rather than hard-edged.
- Salt: Balances sweetness and makes the butter flavor shine through.
- Unsalted butter, softened: Room temperature is everything here; cold butter won't cream properly and you'll miss that light, fluffy texture.
- Granulated sugar: Creaming it with butter is where the magic starts, incorporating air that keeps cookies delicate.
- Egg: Binds everything and adds richness; use it at room temperature for best mixing.
- Vanilla extract: Pure vanilla matters more than you'd think; it's the backbone of flavor in such a simple cookie.
- Powdered sugar: Sift it before using so your icing stays smooth and glossy without lumps.
- Egg whites: Pasteurized versions are safest and easier to work with; they whip into those glossy stiff peaks you need for piping.
- Pastel food coloring: Gel colors are more concentrated than liquids, so you use less and keep your icing consistency perfect.
Tired of Takeout? 🥡
Get 10 meals you can make faster than delivery arrives. Seriously.
One email. No spam. Unsubscribe anytime.
Instructions
- Whisk your dry team together:
- In one bowl, whisk flour, baking powder, and salt until they're evenly distributed. This prevents streaks of baking powder in your cookies and ensures consistent rise.
- Cream butter and sugar until clouds form:
- Beat them in a large bowl until pale, fluffy, and noticeably lighter than when you started—this takes about two or three minutes. You're incorporating air, which makes the cookies tender.
- Bring the egg and vanilla into the party:
- Beat them in one at a time until everything is creamy and smooth. The mixture should look like pale mousse at this point.
- Marry the wet and dry:
- Add the flour mixture gradually, mixing on low speed until just combined. Overmixing develops gluten and makes cookies tough, so stop as soon as streaks disappear.
- Let the dough chill and think:
- Shape into a disc, wrap it in plastic, and refrigerate for at least an hour. Cold dough is easier to roll out and holds shapes without spreading during baking.
- Heat your oven and prepare surfaces:
- Preheat to 350°F and line baking sheets with parchment paper. This temperature bakes cookies evenly without browning the bottoms too quickly.
- Roll with confidence:
- On a lightly floured surface, roll dough to about 1/4-inch thickness. Flour your rolling pin and surface lightly to prevent sticking without toughening the dough.
- Cut and space with intention:
- Use flower or round cutters and place cookies an inch apart. They'll spread slightly during baking, so give them room to breathe.
- Bake until edges whisper golden:
- Bake 10 to 12 minutes until the edges are just golden and the centers still look slightly underdone. They'll continue cooking on the hot pan for a minute after removal.
- Cool completely before touching:
- Transfer to a wire rack and let them rest until completely cool. Warm cookies crack when you try to decorate them.
- Whip your icing into glossy peaks:
- Beat egg whites until frothy, then gradually add sifted powdered sugar and extract. Keep beating until stiff peaks form and the icing is glossy and thick.
- Tint thoughtfully:
- Divide icing into bowls and add gel food coloring drop by drop, stirring until you reach soft pastels. A little goes a long way with gel colors.
- Adjust consistency by feel:
- For flooding large areas, add a tiny bit of water to thin it slightly. For piping details, keep it thick enough to hold its shape.
- Pipe flowers like you're telling a story:
- Using small round or petal tips, pipe delicate flowers, leaves, and details onto cooled cookies. There's no rush—let each cookie become its own small design.
- Let icing dry completely:
- Allow at least two hours of drying time before stacking or packaging. Icing that's fully set won't smudge when cookies touch.
 Save to Pinterest
 At the baby shower, a little girl who couldn't have been more than four years old pointed at the cookie tower and said, "They're too pretty to eat," which is the highest compliment a decorated cookie can receive. Her grandmother gently told her the prettiness was the whole point, that it made eating them more of an event. I watched them share one cookie between them, and somehow that moment—the two of them bent close, mouths dusted with powdered sugar—felt like the real celebration.
When to Make These
Spring celebrations practically demand these cookies—baby showers, bridal events, Easter gatherings, or just because the weather turned warm and you want your kitchen to smell like vanilla. I've also made them in winter when someone needed edible centerpieces that would actually taste good, and no one complained. Think of them whenever you need food that's equal parts delicious and display-worthy.
The Icing Adventure
Royal icing has a reputation for being fussy, but honestly, once you understand it's just egg whites, sugar, and patience, it becomes oddly meditative. The first time I made it, I beat the egg whites until I panicked they were overbeaten, but they held their peaks beautifully—turns out that glossy, stiff point is exactly where you want to be. My advice is to take your time, trust the process, and know that lumpy icing can be fixed by straining it through cheesecloth while no piping bag can fix a batch that's too thin.
Storage and Keeping
These cookies love airtight containers and will stay fresh for five days, though honestly, they never last that long in my house. I've learned to layer them with parchment between rows to prevent the decorated sides from touching and smudging. If you're planning ahead, baked cookies freeze beautifully for up to a month, so you can decorate fresh the day before serving.
- Freeze undecorated baked cookies in an airtight container for up to a month before icing.
- Decorate fresh the day before an event so icing has time to fully harden and set.
- Store in layers with parchment paper between each row to protect the delicate designs.
 Save to Pinterest
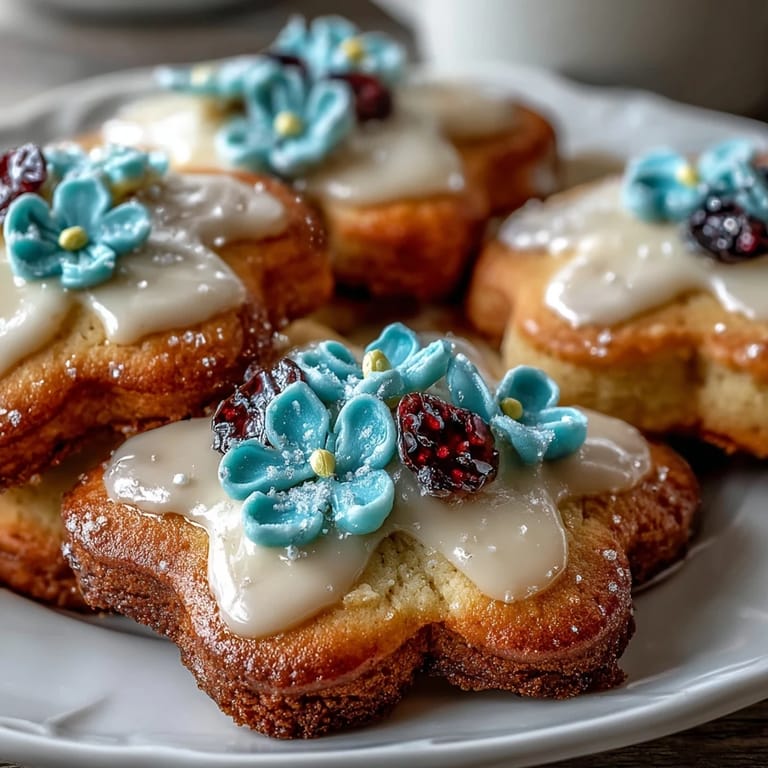
 These cookies are proof that baking doesn't have to be complicated to be special. When you line them up—these small, pale, flower-covered tokens of care—you've made something that nourishes both hunger and the heart.
Recipe FAQ
- → How long should I chill the dough before baking?
Chilling the dough for at least 1 hour helps it firm up, making it easier to roll and cut precise shapes.
- → What is the best way to achieve pastel colors in royal icing?
Use gel or powdered food coloring sparingly, adding a small amount until the desired soft pastel shade is reached.
- → Can I prepare royal icing flowers ahead of time?
Yes, royal icing flowers can be piped onto parchment and dried completely before transferring to the cookies.
- → How should I store decorated cookies to maintain freshness?
Store cookies in an airtight container at room temperature for up to 5 days to keep them fresh and crisp.
- → What tools are recommended for decorating cookies with royal icing?
Use piping bags fitted with small round or petal tips for detailed floral designs and smooth lines.